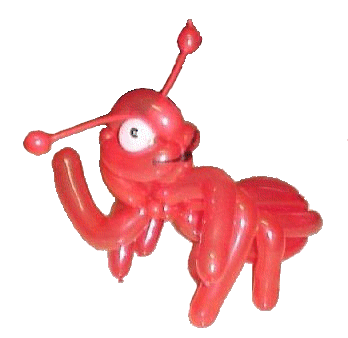
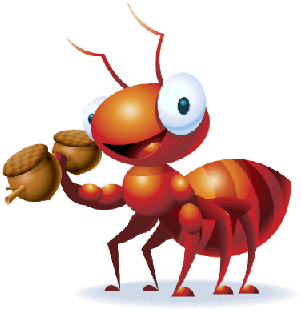
Make a Balloon SculptureVisit my VBS 2002 page to find more Bug Safari ideas.Bug Safari #2 |
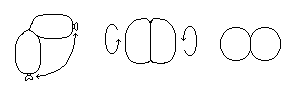 |
Inflate the white scrap to about 4 inches and tie it off. Twist it into two
equal bubbles and then tie the opposite ends together. Now twist the two bubbles in opposite directions, effectively making both of them a pinch twist. Save these for the eyes. |

 
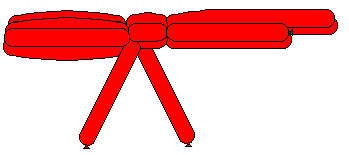
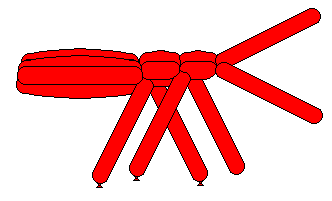
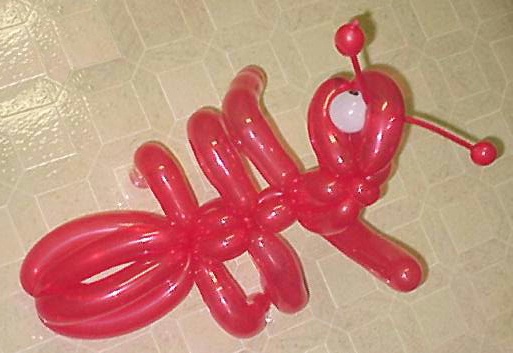
| Now you should have two segments that are a half balloon long, two that are shorter, and two that are longer. Bundle all six bubbles together and twist them at about the middle of the shortest pair of bubbles. This forms the abdomen. |
 | 
|
|
Separate out the two shortest bubbles and twist the remaining four bubble together about 3 inches from the abdomen. Make another twist in the two longest bubbles about 3 inches from the last twist. Now you have three pairs of legs extending from the thorax. Make a Z-bend in the middle of each leg. If you want arnold to stand on his own, you can weight his feet by attaching a penny in a small pinch twist at the end. Alternatively, you can insert the pennies in the balloons before inflating them. |
 | 
|
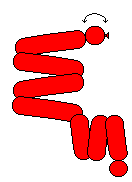
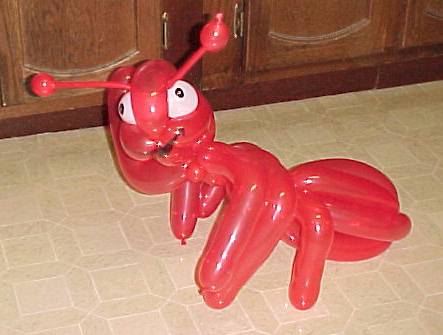
The body is complete; now we need to make the head. Inflate the fourth balloon leaving about a 4-inch tail. Make a soft 1.5-inch bubble followed by four 6-7 inch bubbles. Pinch twist the small bubble and lock twist the others together in pairs.
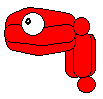
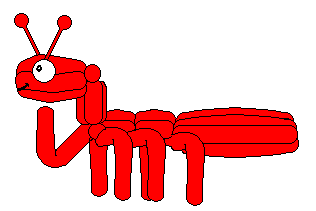
Push one bubble of one pair between the other pair to make a bundle of four bubbles. Pull one bubble up enough to push the eyes underneath it with one eye on each side. In the remaining balloon make a 3-bubble roll-through for the neck, leaving a 1.5-inch bubble at the end. Use this last twist to connect the neck to the body at the two front legs. Use a dry-erase marker to add details to the eyes and mouth. Blow just enough air into the fifth balloon to make a 1/2 - 1 inch bubble in each end. Tuck this through the head just above the eyes for antennas. A twist in the middle (unflated) part of this balloon will help keep the air from all going to one end. |
According to Web Counter
you are visitor number
- See previous sculpture.
- Link to Balloon HQ
- Basic Balloon Twists.
- Return to the Wonder Factory
Lots of pictures, people and ideas for balloon sculptors.